Unreal Engine 5.5: Display Real-Time Clock in Your Game | Easy Tutorial
Published: January 05, 2025 • Series: UI and HUD • Level: beginner
This is Rambod and in this tutorial we create a real-time clock inside your Unreal Engine 5.5 game. By the end, your project will display the system time directly in the UI, updating every second.
1) Create the widget
- Open the Content Drawer.
- Right click → User Interface → Widget Blueprint.
- Select User Widget and name it
WBP_HUD_Clock. - Open it and in the Palette, drag a Canvas Panel into the workspace.
- Add a Text Block inside the canvas.
- Set the font size (for example 35).
- Check Is Variable and rename it
TextBlock_Clock. - Compile and save.
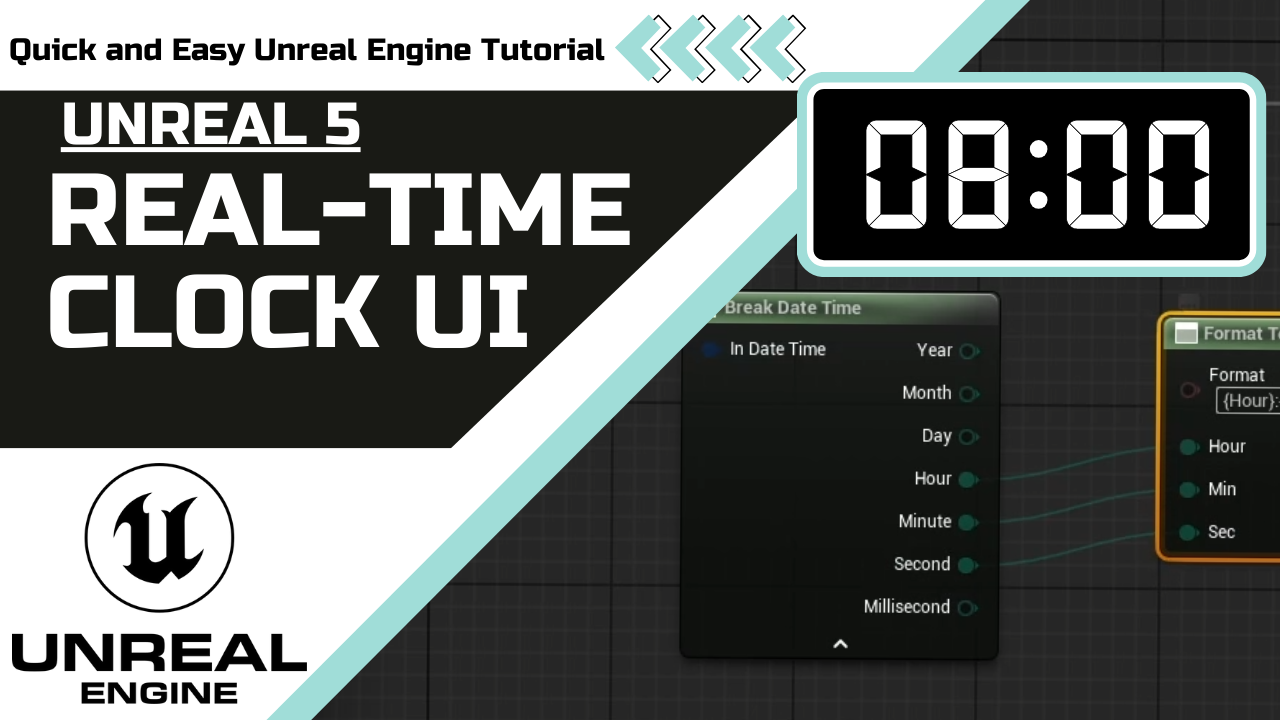
2) Bind the clock value
- With the text block selected, click Create Binding for its content.
- In the binding function:
- Add the Now node to get the current system time.
- Break the DateTime into components (hour, minute, second).
- Add a Format Text node. Use placeholders like
{Hour}:{Minute}:{Second}. - Connect the broken DateTime outputs to the matching pins.
- Return the formatted string.
- Save your work.
3) Add the widget to your game
- Open your Character Blueprint.
- Locate Event Begin Play. If not present, override it.
- Add a Create Widget node.
- Choose the
WBP_HUD_Clockclass. - Connect it to Add to Viewport.
- Compile and save.
4) Test the setup
- Play the game.
- The real-time clock will appear in the corner of the screen.
- It updates automatically every second, reflecting your system’s current time.
Wrap up
With just a few steps you have added a real-time clock to your Unreal Engine project. This is a great way to practice widget bindings and formatting in Blueprint.
For more Unreal Engine tutorials, visit rambod.net, subscribe on YouTube, or watch this tutorial here: Watch on YouTube.
Support
Support My Work
If my projects, tutorials, or research help you ship faster, you can back the work directly with crypto. Every contribution keeps the channel ad-light and the repos open.