Unreal Engine 5.5: Display Real-Time Clock in Your Game | Easy Tutorial
Show a real-time clock in Unreal Engine 5.5 using a widget blueprint. Learn to format time, bind DateTime, and display the clock in your game UI.
This is Rambod and in this tutorial we create a real-time clock inside your Unreal Engine 5.5 game. By the end, your project will display the system time directly in the UI, updating every second.
1) Create the widget
- Open the Content Drawer.
- Right click → User Interface → Widget Blueprint.
- Select User Widget and name it
WBP_HUD_Clock. - Open it and in the Palette, drag a Canvas Panel into the workspace.
- Add a Text Block inside the canvas.
- Set the font size (for example 35).
- Check Is Variable and rename it
TextBlock_Clock. - Compile and save.
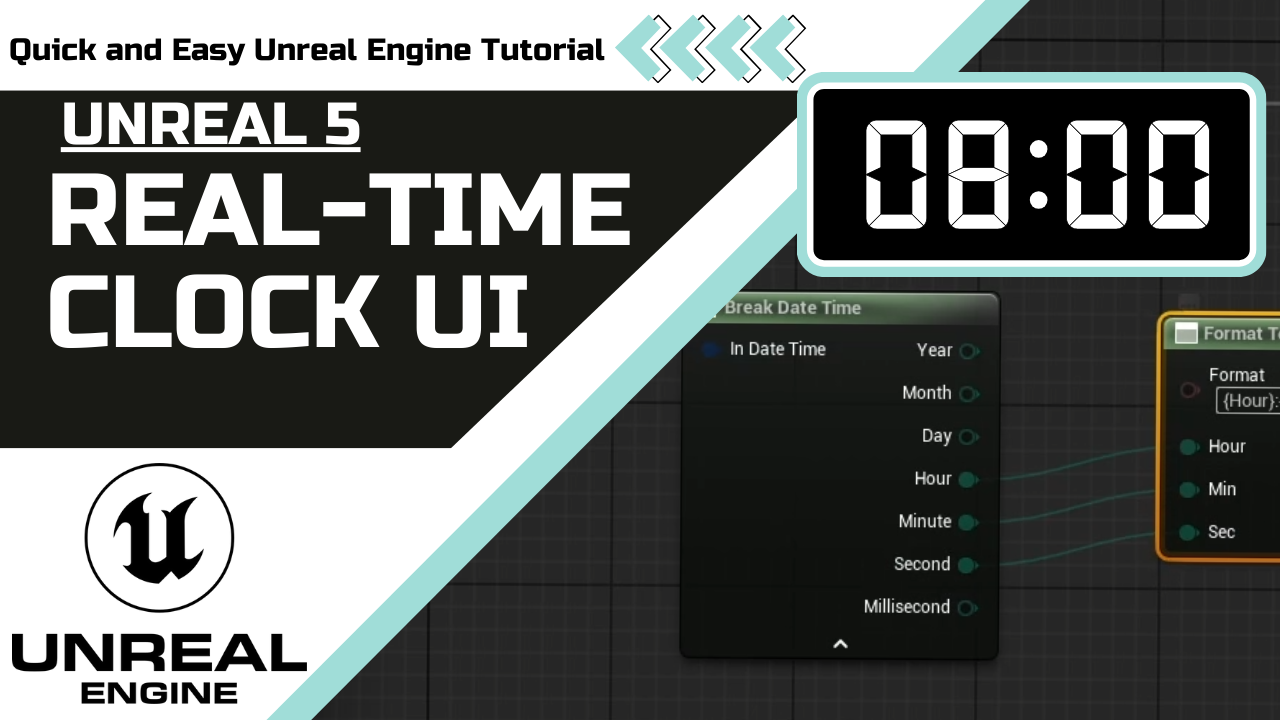
2) Bind the clock value
- With the text block selected, click Create Binding for its content.
- In the binding function:
- Add the Now node to get the current system time.
- Break the DateTime into components (hour, minute, second).
- Add a Format Text node. Use placeholders like
{Hour}:{Minute}:{Second}. - Connect the broken DateTime outputs to the matching pins.
- Return the formatted string.
- Save your work.
3) Add the widget to your game
- Open your Character Blueprint.
- Locate Event Begin Play. If not present, override it.
- Add a Create Widget node.
- Choose the
WBP_HUD_Clockclass. - Connect it to Add to Viewport.
- Compile and save.
4) Test the setup
- Play the game.
- The real-time clock will appear in the corner of the screen.
- It updates automatically every second, reflecting your system’s current time.
Wrap up
With just a few steps you have added a real-time clock to your Unreal Engine project. This is a great way to practice widget bindings and formatting in Blueprint.
For more Unreal Engine tutorials, visit rambod.net, subscribe on YouTube, or watch this tutorial here: Watch on YouTube.