
In this tutorial, we’ll dive into Chapter 7 of Programming in Rust by Steve Klabnik and Carol Nichols. We’ll explore Rust’s module system, including how to organize code into modules, control scope and privacy with the pub keyword, and use structs to represent real-world entities.
But instead of just explaining these concepts dryly, let’s imagine you’re opening a restaurant! Along the way, we’ll learn how to organize our code, just as you would organize your kitchen, staff, and menu.
“Imagine a kitchen with everything in its proper place. Some ingredients are available to chefs, while others are kept secret—known only to a select few. This is what working with modules in Rust feels like!”
What You’ll Learn:
- How to organize code into modules
- Using
pubto control what parts of the module are public - Structuring a binary crate for real-world functionality
- Rust structs, implementations, and methods
The Code:
We’re going to build a Restaurant management system. You’ll have modules representing the kitchen, menu, and staff, each with specific roles and responsibilities. Let’s explore each part, followed by some sample code.
Setting Up Our Project
Create a new Rust project. In your terminal or IDE, run:
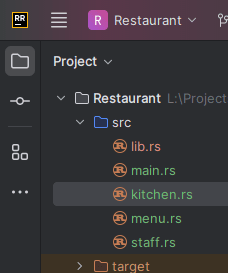
cargo new restaurant --libYou should now have a folder named restaurant with a Cargo.toml file and a src directory. We’ll start adding our modules here.
1. The Kitchen Module
The kitchen is where the magic happens, where dishes are prepared. We’ll keep this module simple with a function prepare_dish, which will take a dish name and return a string saying the dish is being prepared.
Code: src/kitchen.rs
pub fn prepare_dish(dish: &str) -> String {
    format!("Preparing {}", dish)
}
We make the function public by using the pub keyword, so that it can be accessed outside the kitchen module.
2. The Menu Module
In a restaurant, the menu lists the available dishes. We’ll create a get_menu function to provide the available dishes as a list, and we’ll also add a secret_recipe function, which won’t be exposed publicly.
Code: src/menu.rs
pub fn get_menu() -> Vec<&'static str> {
    vec![
        "1. Pizza",
        "2. Pasta",
        "3. Salad",
        "4. Soup",
        "5. Steak",
        "6. Fish",
        "7. Vegetarian",
        "8. Meat",
        "9. Sauce",
        "10. Wine",
        "11. Tea",
        "12. Coffee",
        "13. Cake",
    ]
}

pub fn secret_recipe(dish: &str) -> String {
    format!("This is a secret recipe for {}", dish)
}
Notice that the secret_recipe function is also public (pub), but we can control whether or not to call it externally.
3. The Staff Module
The staff in our restaurant includes chefs and waiters. Each has different responsibilities. The chef will use the prepare_dish function from the kitchen to cook food, while the waiter will serve the dish to the customer.
Code: src/staff.rs
use crate::kitchen;

pub struct Chef {
    pub name: String,
}

impl Chef {
    pub fn cook(&self, dish: &str) -> String {
        kitchen::prepare_dish(dish)
    }
}

pub struct Waiter {
    pub name: String,
}

impl Waiter {
    pub fn serve(&self, dish: &str, chef: &Chef) -> String {
        chef.cook(dish)
    }
}
Here, we define structs for Chef and Waiter. Each has methods defined via impl blocks that allow them to perform tasks.
4. Organizing the Crate in lib.rs
We now bring all the modules together by declaring them in the root of the library in lib.rs. The main job here is to make sure all modules are correctly linked.
Code: src/lib.rs
pub mod kitchen;
pub mod menu;
pub mod staff;
This is where our crates come in. Each mod statement brings in a module so we can use it across the entire crate.
5. Writing the Main Application
In the real world, everything comes together in the restaurant. So, we’ll implement our main functionality where we use our modules to simulate restaurant operations.
Code: src/main.rs
use restaurant::{menu, staff};

fn main() {
    let waiter = staff::Waiter { name: String::from("John") };
    let chef = staff::Chef { name: String::from("Jane") };

    println!("Today's menu:");
    for dish in menu::get_menu() {
        println!("- {}", dish);
    }

    let dish = "Pizza";
    println!("Customer orders: {}", dish);
    println!("{}", waiter.serve(dish, &chef));
}
This program first prints the menu, then simulates a customer ordering Pizza, which the waiter passes to the chef to prepare. Finally, the waiter serves the dish to the customer.
The Result
Running cargo run in the terminal gives the following output:
Today's menu:
- 1. Pizza
- 2. Pasta
- 3. Salad
- 4. Soup
- 5. Steak
- 6. Fish
- 7. Vegetarian
- 8. Meat
- 9. Sauce
- 10. Wine
- 11. Tea
- 12. Coffee
- 13. Cake
Customer orders: Pizza
Preparing Pizza
A Breakdown of Modules and Scopes
Rust’s module system makes it easy to organize large applications, separating responsibilities into different files. The pub keyword allows you to control visibility—only exposing the necessary parts of a module. This is a powerful feature when developing larger codebases, where modularity and encapsulation are key.
Wrapping Up
You’ve now learned the essentials of modules, structs, and functions in Rust by simulating a restaurant! From this tutorial, you should understand how to:
- Organize your code into modules for better readability.
- Control visibility with
pub. - Structure
structsto model real-world entities like Chef and Waiter. - Utilize methods and bring everything together in a main.rs application.
References:
- Klabnik, Steve, and Carol Nichols. The Rust Programming Language. No Starch Press, 2019. Programming in Rust
- Official Rust Documentation. “Crates and Modules.” Rust Lang Docs
- Rust By Example. “Modules.” Rust By Example
- Cargo, The Rust Package Manager. “Cargo and Crates.” Official Cargo Documentation
- Rust – Understanding Ownership and Borrowing for Optimal Performance